Unlocking a new Start Menu – Chicago Build 73g
This guide will walk you through unlocking a hidden start menu prototype in Windows "Chicago" build 73g - and give you an insight into reverse engineering.

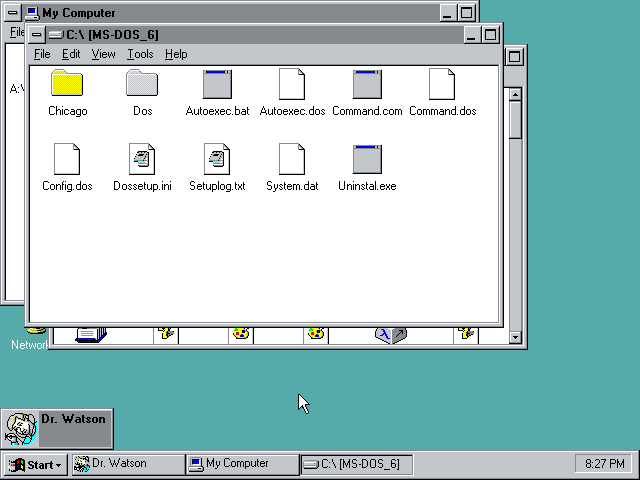
“Chicago” was the internal codename for the Microsoft Windows 95 project. Chicago Build 73g is one of the earliest leaked builds, carrying a date of 2nd December 1993. As such, the User Interface is still some way off what would ship in Windows 95. This build, however, is the first known build to contain resources for the start menu that we’d later see debut in Build 81, and carry on in the same basic form until the new start menu was introduced in Windows XP, and was only removed with the introduction of Windows 7.
This guide will walk you through the process of unlocking this hidden start menu prototype and give you an insight as to how you can apply the process to other locked features in pre-release Windows builds.
Pre-requisites
To follow this tutorial, you will need a copy of IDA Disassembler, a Resource Editor and Hex Editor of your choice. I have used IDA Pro v6.1, Resource Hacker and HxD Editor in this tutorial. You will also, of course, require a fully functional Chicago Build 73g installation should you want to see the fruits of your labour.
Instructions
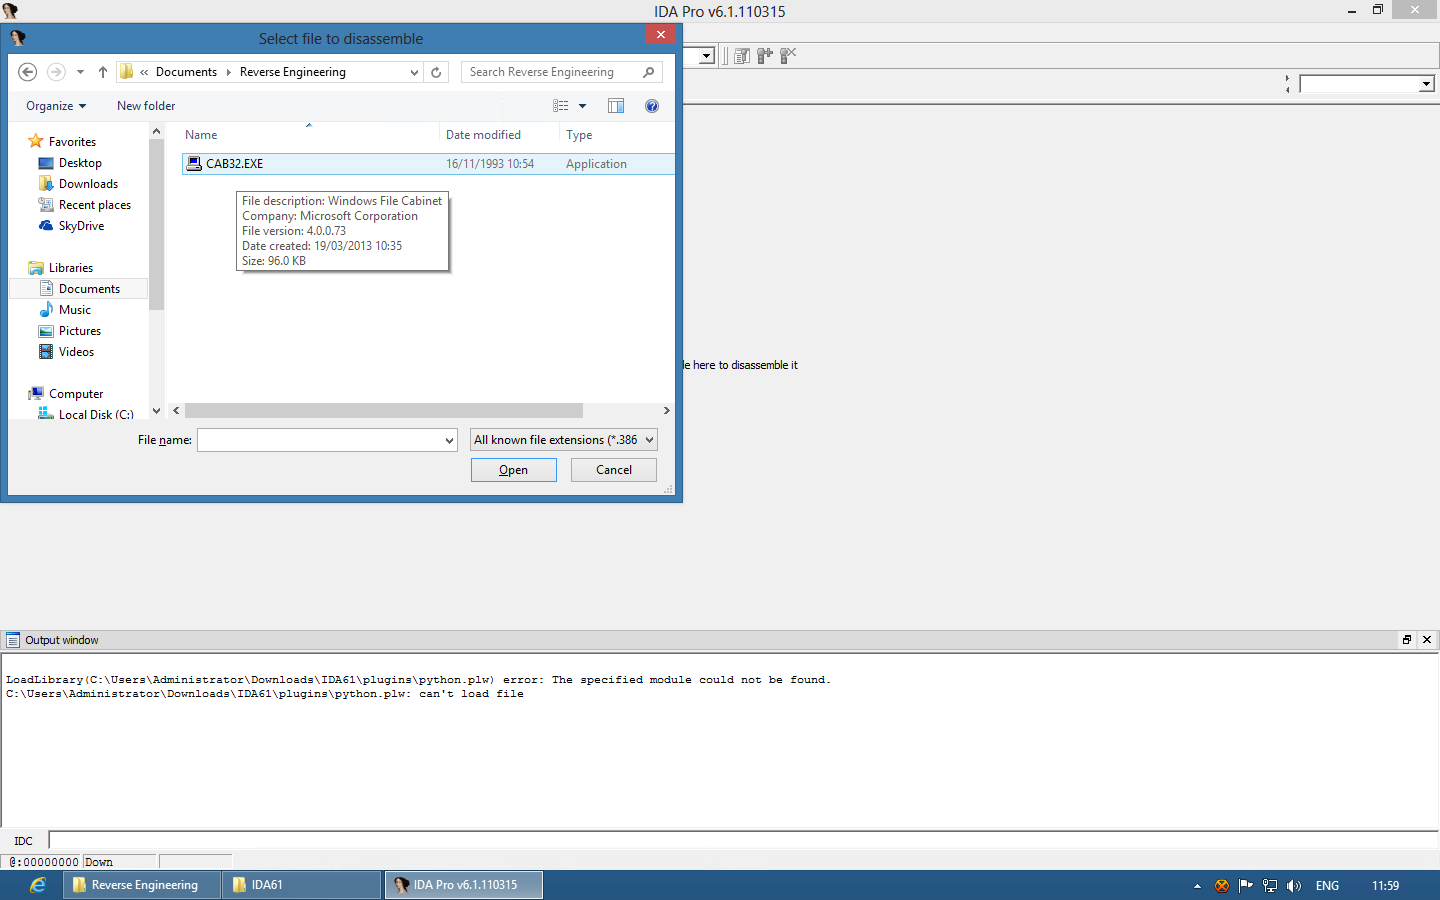
Step 1: Load a copy of CAB32.EXE into IDA and Resource Hacker
In early Chicago builds, CAB32.EXE is the precursor to explorer.exe – the main shell of Windows. You can either copy it from a machine running Chicago, or copy it from the installation CD as I did. Then open the file in IDA and Resource Hacker. You won’t actually be making any edits in either of these applications, but they will help you find the bytes to change later in the hex editor.

Step 2: Locate the Menu-handling code and adjust it to load the “new” Start Menu
In Resource Hacker, expand the “Menu” resource type. Inside, there are four Menu resources. We are interested in the second two – 203 and 204. If you look closer, you’ll notice that 203 is the default Menu resource; it has three “POPUP” items, each with it’s own menu that matches up to the three buttons in a default Chicago Build 73g installation. Menu resource 204 is interesting. It only has one POPUP – and it appears to offer a combination of the three menus we saw in resource 203. It’s our new “Start Menu”, and clearly represents a closer precursor that which would ship in Windows 95.
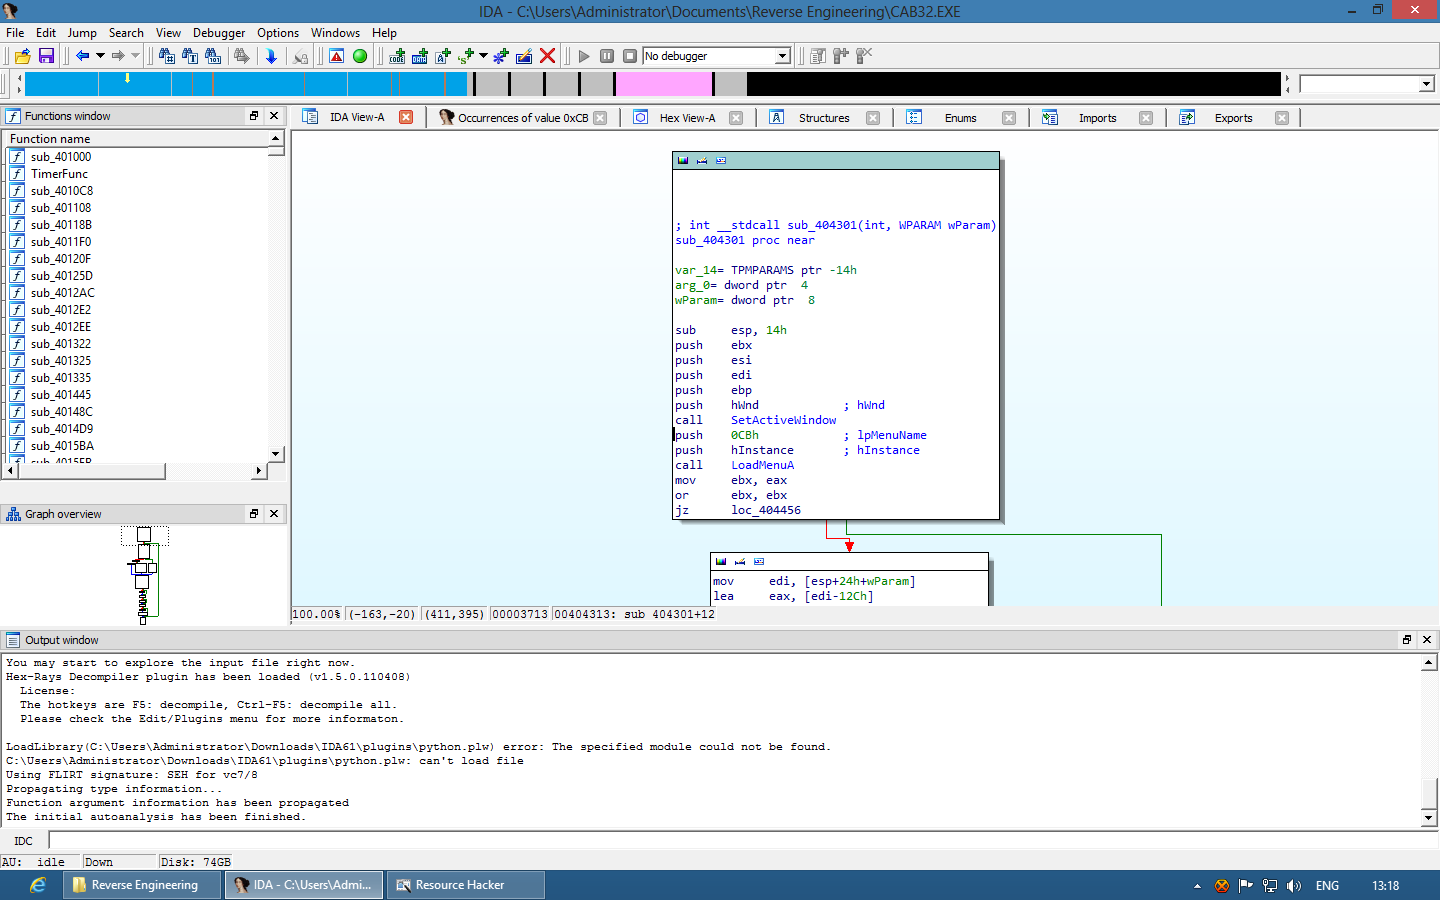
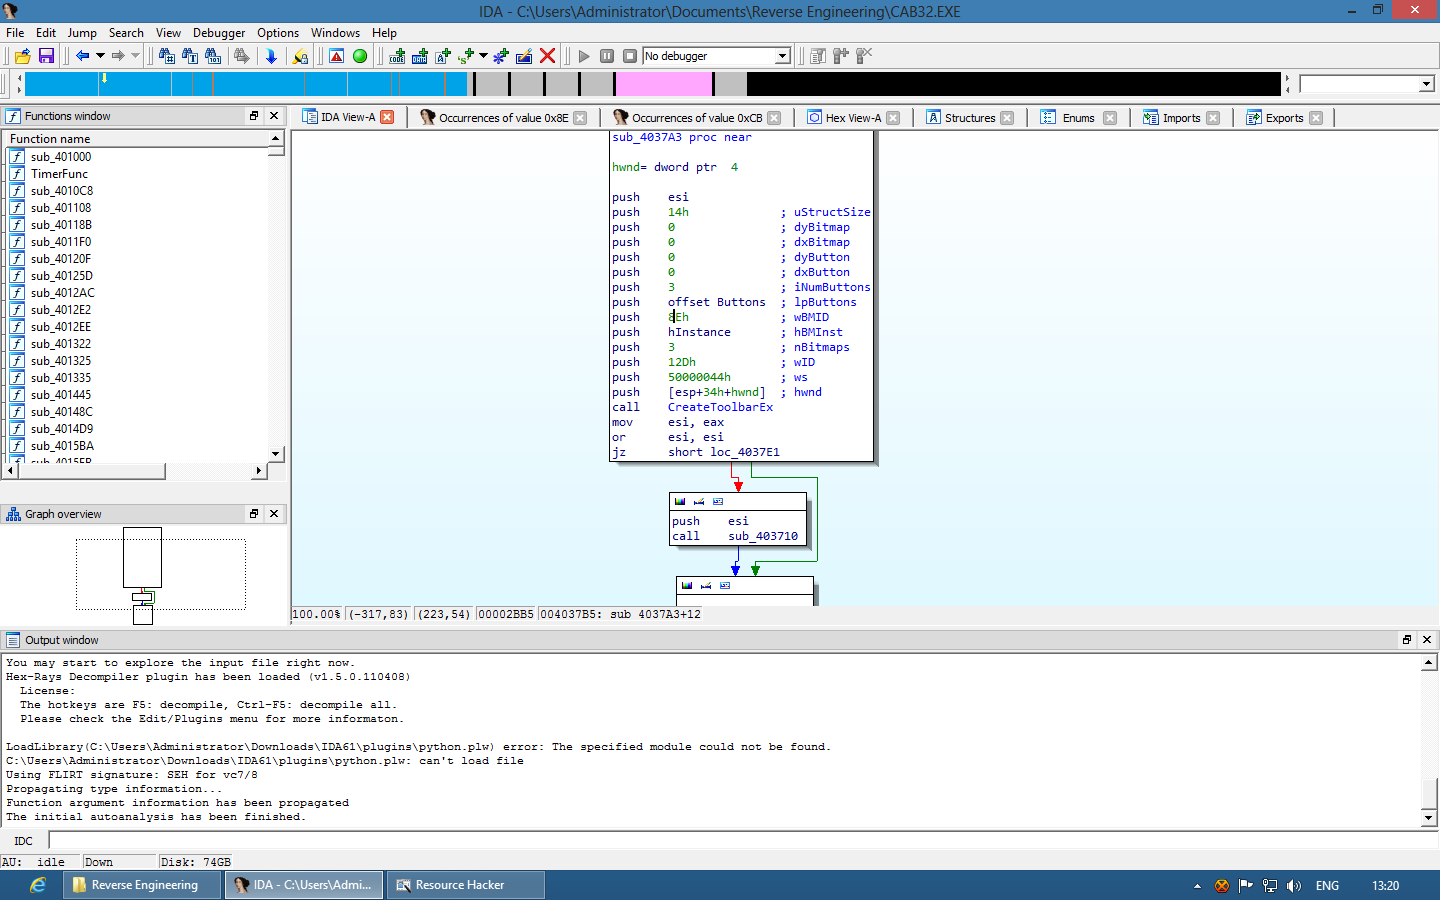
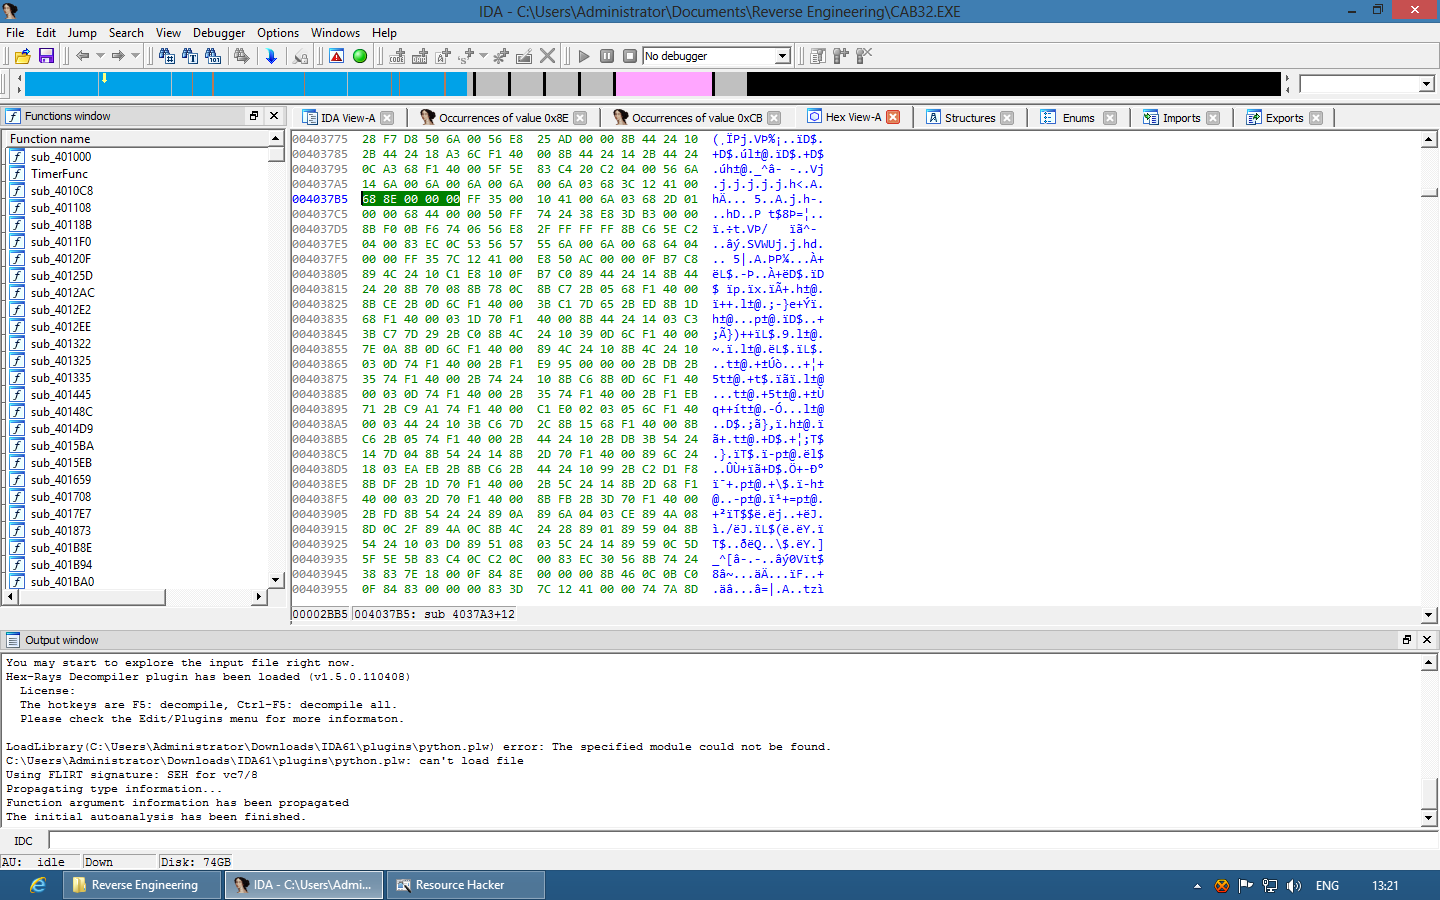
Our first task then is to update the code in CAB32 to use the new menu, rather than the old three-button menu. In the IDA Toolbar, there is a search icon with a hash (#) symbol overlaid. This is the “Search Immediate Value” button, and clicking it will open a dialog box that allows you to search for a specific numerical value in the code. By default, it takes a hex value in the form of 0xVALUE, but simply searching VALUE will without the 0x will treat the value as decimal rather than hexadecimal. Type “203″ into the box, without the quotes, and untick “Any untyped value” and tick “Find All Occurrences”. This will open a new tab with all instances of the value. Fortunately, this isn’t a particularly common integer, and there’ll only be a handful of options. Helpfully, some versions of IDA will automatically detect that is being used with the “LoadMenuA” function, and label it as “; lpMenuName”. Simply double-click this item and it will take you to the code view.
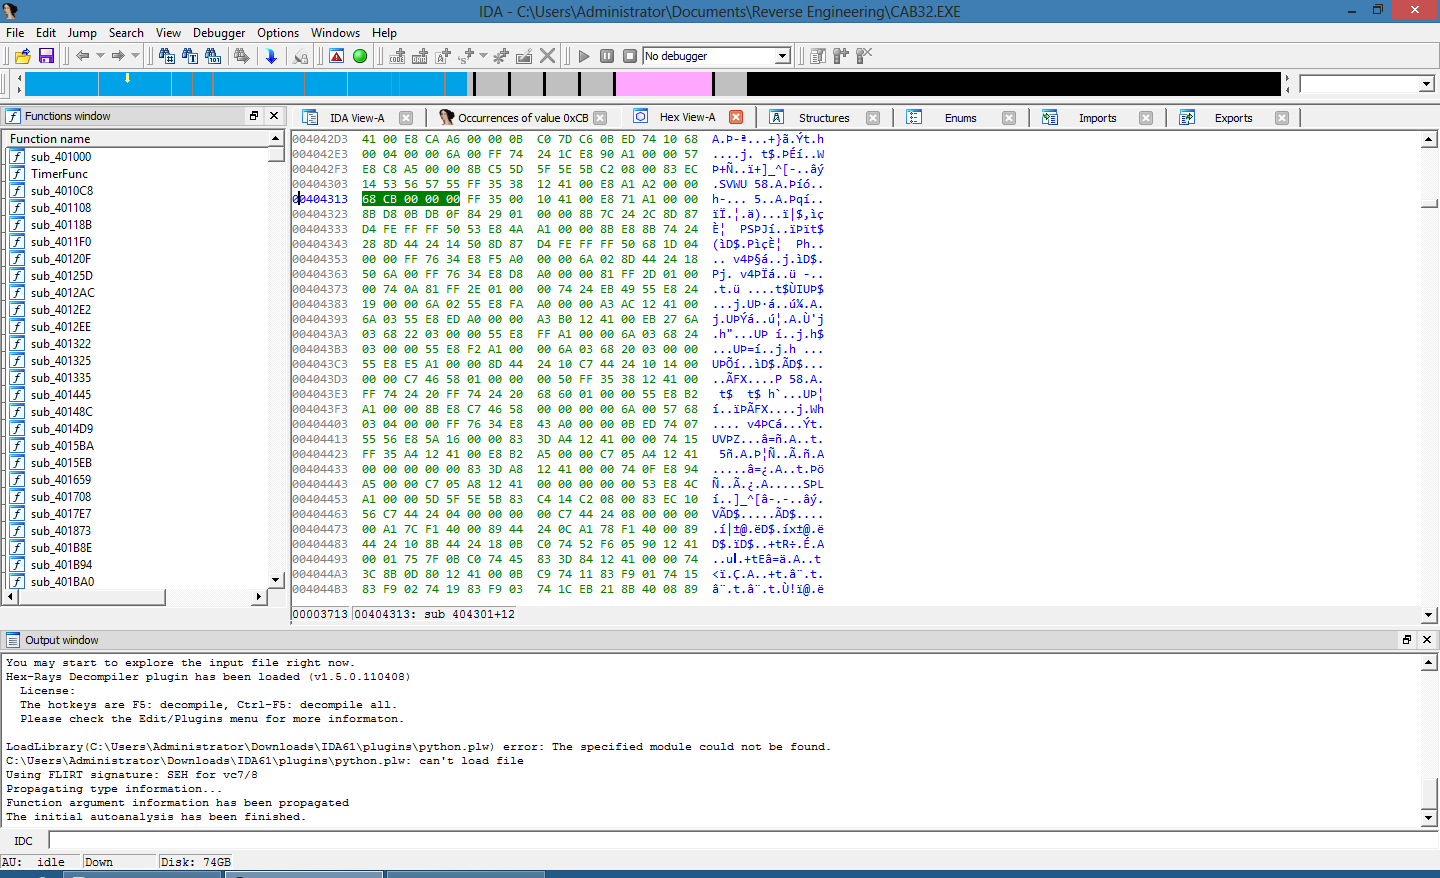
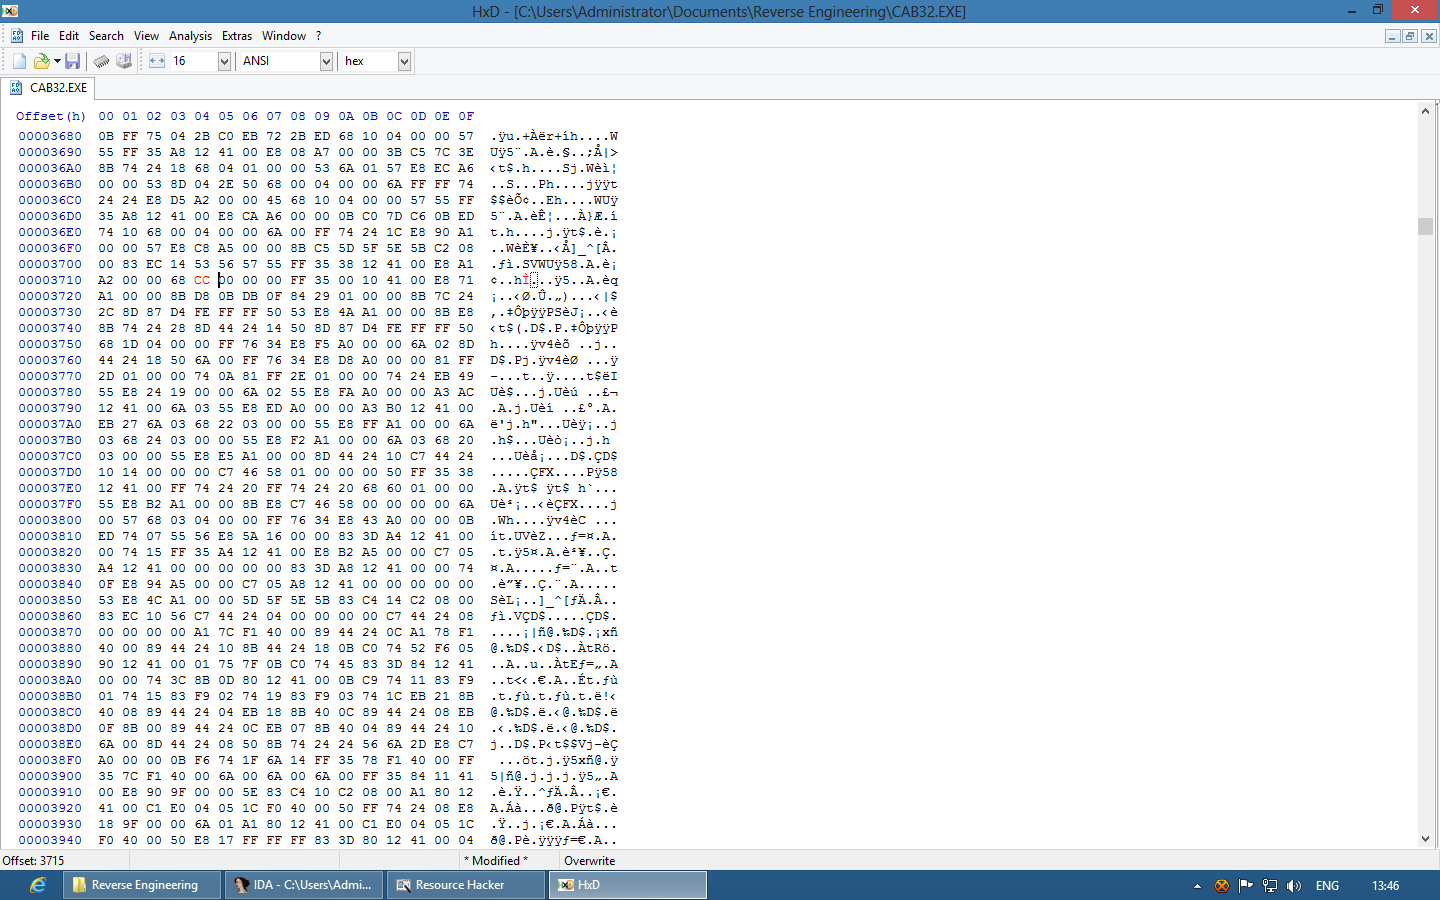
Now that we’ve found the code, it’s time to update it to use resource 204 rather than 203. You’ll see that the instruction we have to edit is “push 0CBh” – which simply pushes a value of 203 onto the stack. Our change will be to simply increment that value so that it pushes 204 onto the stack instead. Place your cursor in the push instruction line, and hop over to the “Hex View” in IDA. You will notice that a five byte block is highlighted: “68 CB 00 00 00″ – this is the push instruction in binary form, 0×68 being “PUSH” and 0x000000CB being 203 as a 32-bit integer in little-endian form (little-endian means that the least significant bytes are placed first in RAM, making them appear reversed to us, as we are used to having the most significant byte first in our number systems).
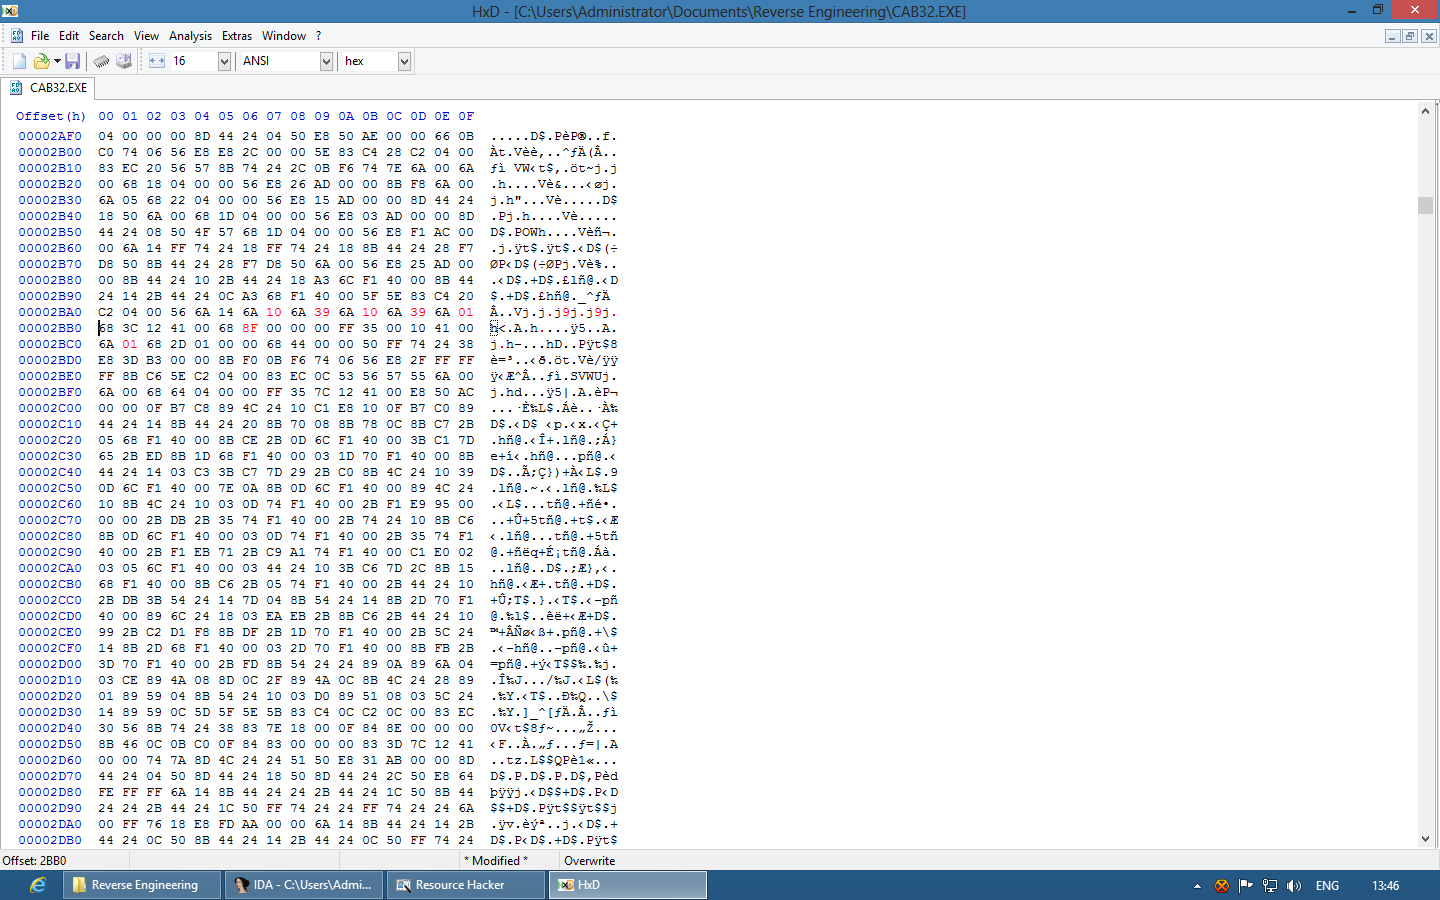
Ensure your cursor is within the instruction that you wish to edit, so that it is highlighted. You’ll notice in the bottom left-hand corner of the Hex View that there are three items – two hexadecimal numbers and a symbol name. These are the file offset, the executable offset and the symbol + offset respectively. Note down the file offset. Open your hex editor of choice – I’m using HxD Editor in these examples. Open the CAB32.EXE file inside your hex editor, and locate it’s “Go To” function. This is almost universally accessible using Ctrl+G, but it ultimately depends on your editor. Type in the File Offset into the Offset text box. IDA’s file offset is a hex number that is relative to the beginning of the file, so make sure that your hex editor’s settings resemble that if they’re configurable. This will jump you to the instruction you were just looking at in IDA. You can now overwrite the “CB” byte with “CC”.

Step 3: Locate and update the Toolbar-handling code and update it to create the single “Start” button
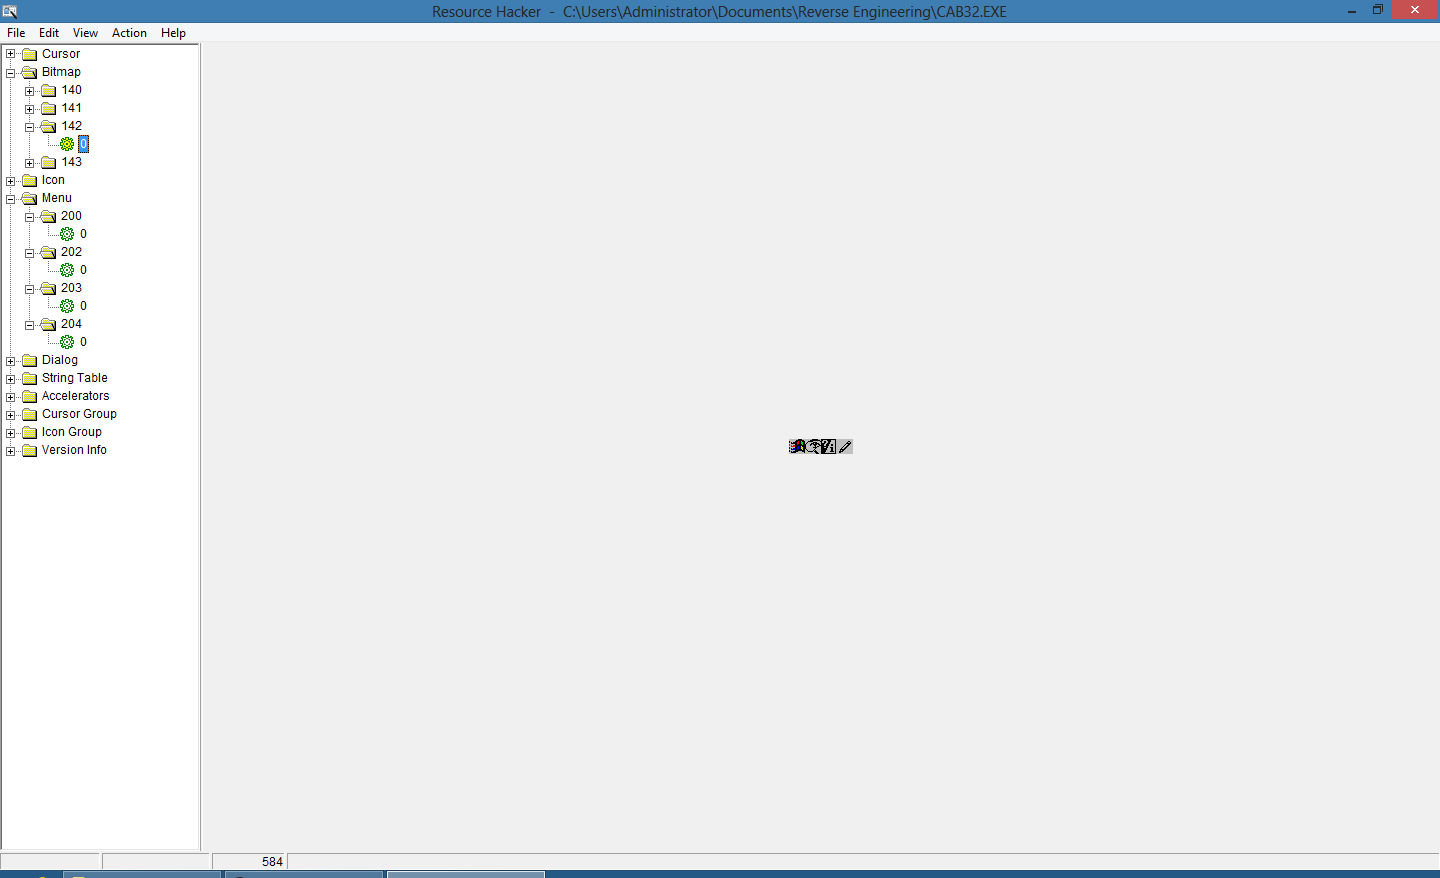
Now, if we were to test our progress so far, we’d find that when we clicked that first Chicago button, our new menu would pop up as expected. However, the other two buttons would now be utterly useless, and we still wouldn’t have our shiny “Start” button. Let’s flick back to Resource Hacker and check out the “Bitmap” resource type. In there, like with the menu, there are four resources, and like with the menu, the second two appear to be an old “set” of buttons and a new single button bitmap. The old set, contained in resource 142 has the three icons of the buttons in Chicago. This is clearly used by CAB32.EXE to create the buttons in the taskbar. Interestingly, there’s a fourth icon. I have no idea what this is for, and there doesn’t appear to be any code related to it, and it gets cut off by CAB32 and remains unused as far as I can see. Resource 143 is a bitmap far more recognisable as a Start Button, being much closer in concept to what would later ship in Windows 95.
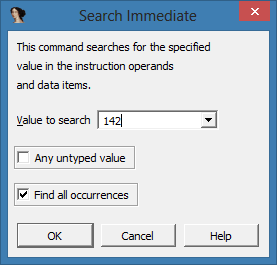
Let’s go back to IDA then, and search for 142 in the Search Immediate Value dialog. Keep “Any untyped value” unticked and “Find all occurrences” ticked, as before. We’ll see that one result is labelled “; wBMID” by IDA - this is what we’re looking for. It’s the ID of a Bitmap resource being passed into a function called “CreateToolbarEx”. Obviously, we’ll want to update this line from pushing 142 (or “08Eh” as it’s shown in IDA) to 143, but there are further concerns. Simply using a different bitmap will not stop CAB32 from creating the three Chicago buttons – it’ll just split up the Start bitmap and spread it across them.
At this point, it’s helpful to check the Microsoft documentation for “CreateToolbarEx”. In reverse engineering, documentation is a luxury you often don’t have, but when you do, it can simplify your job by several orders of magnitude. Fortunately, “CreateToolbarEx” is a well documented Win32 function, and despite it being considered Obsolete for some time, Microsoft still keep extensive documentation for it. Searching for “CreateToolbarEx” will take you straight to the current Microsoft documentation page for it. There we have every parameter that IDA highlights explained in more than sufficient detail. There are seven parameters for the function that we want to change – dyBitmap and dxBitmap, which are the height and width of the image to display on each button; dyButton and dxButton, which are the height and width of each button; iNumButtons, which is the number of buttons to add to the toolbar; nBitmaps, which is the number of different “slices” to create from the bitmap we pass; and lastly, wBMID, which is of course, the resource ID of the bitmap we wish to use. The “Start” bitmap is 57×16, so we should set dyBitmap and dyButton to 16, or 0×10, and dxBitmap and dxButton to 57, or 0×39. We should then change iNumButtons and nBitmaps both to 1, and increment wBMID to 143, or 0x8F.
Fortunately, all this code is together, so we can just hop over to hex view, find the first instruction we need to change, and then move sequentially forward from there. There is a fair bit to match up and replace here, so it might take a while to get your bearings, and get them right. It doesn’t help that there’s a row of pushing 0s, but they’re all in the same order they appear in the code listing in IDA, so it’s best to take your time and double check each change. You can also compare them to the last screenshot beneath this paragraph, which has the changes shown, highlighted in red.
Once these changes have been made, you can save the file in your hex editor.
End Result
Now you can simply copy that modified CAB32.EXE back to your machine running Chicago b73g. You’ll probably want to replace it from DOS rather than attempt to replace it whilst Windows is running, for simplicities sake.
Once this has been done, you’ll find that you’ll have gone from your standard three button layout to the first glimpse of the new Start Menu that would eventually ship with Windows 95.
